Beginners Guide To Git & GitHub

Frontend Developer and Technical Writer. Passionate about learning new technologies, building solutions, and breaking down complex topics into digestible ideas.
Introduction
Change is constant, they say and it rings true in the world of software development. Whenever we work on a project, we're susceptible to tweaking our codes until it gets completed. Without an organized directory of our previous changes, tracking the history of old versions of our codes and newly implemented features can be a bump in our productivity.
In this article, we'll discuss the functionalities of Git & GitHub, and how they can be used to help developers track the history of their codes, collaborate effectively in a team, and contribute to the development of projects.
Version Control System
A version control system is a tool that manages and tracks the changes made to a source code repository. This software was designed to help users track the changes made to their code, as it provided them with the ability to take snapshots of their work as they progressed in their project.
In addition to that, it also helped combat management issues that arose from the clutter of tangled contributions from software teams.
GIT: A Distributed Version Control System
Back in the day, developers working on a project had to manually share files and maintain their codes on a central server. If the server ever went down or had issues, it could disrupt the entire team's workflow. This problem reflected the proverbial saying: "Putting all your eggs in one basket".
Conflicts also arose when multiple developers tried to commit changes to the central server simultaneously. This posed a huge problem for teams when merging changes and resolving conflicts.
Git was created to address these challenges by introducing a more decentralized approach to the workflow.
Git is a distributed version control software used for tracking and managing changes to codes over time. It was created in 2005 by Linus Torvalds, the creator of the Linux operating system.
Over the years, Git has grown to become the default version control software option for developers due to its high speed, small size, and branching model. But what made Git an even more viable solution was its decentralized design. Unlike centralized counterparts, Git was designed so software teams wouldn’t have to work directly from a central server.
With Git installed on your local device, you don’t have to be on the same network to work on the same project as you can have a copy of the source code and make alterations to it on your very own local repository. The central repository itself was hosted on remote platforms using cloud-based storage such as GitHub or GitBucket. This was a game-changer for software teams as it handed developers the flexibility to work together on a project and make modifications without compromising the integrity of the source code.
This system facilitated seamless collaboration among developers, making it easy for them to test new updates and fine-tune work on the source code in their local repository before pushing it out to the main remote repository. And if the developers ever ran into problems while working, they could always revert to previous versions of their codes as long as it was saved in their repository. This enabled developers to compare copies of their codes, spot mistakes and deal with issues without interfering with the original files.
How To Install GIT
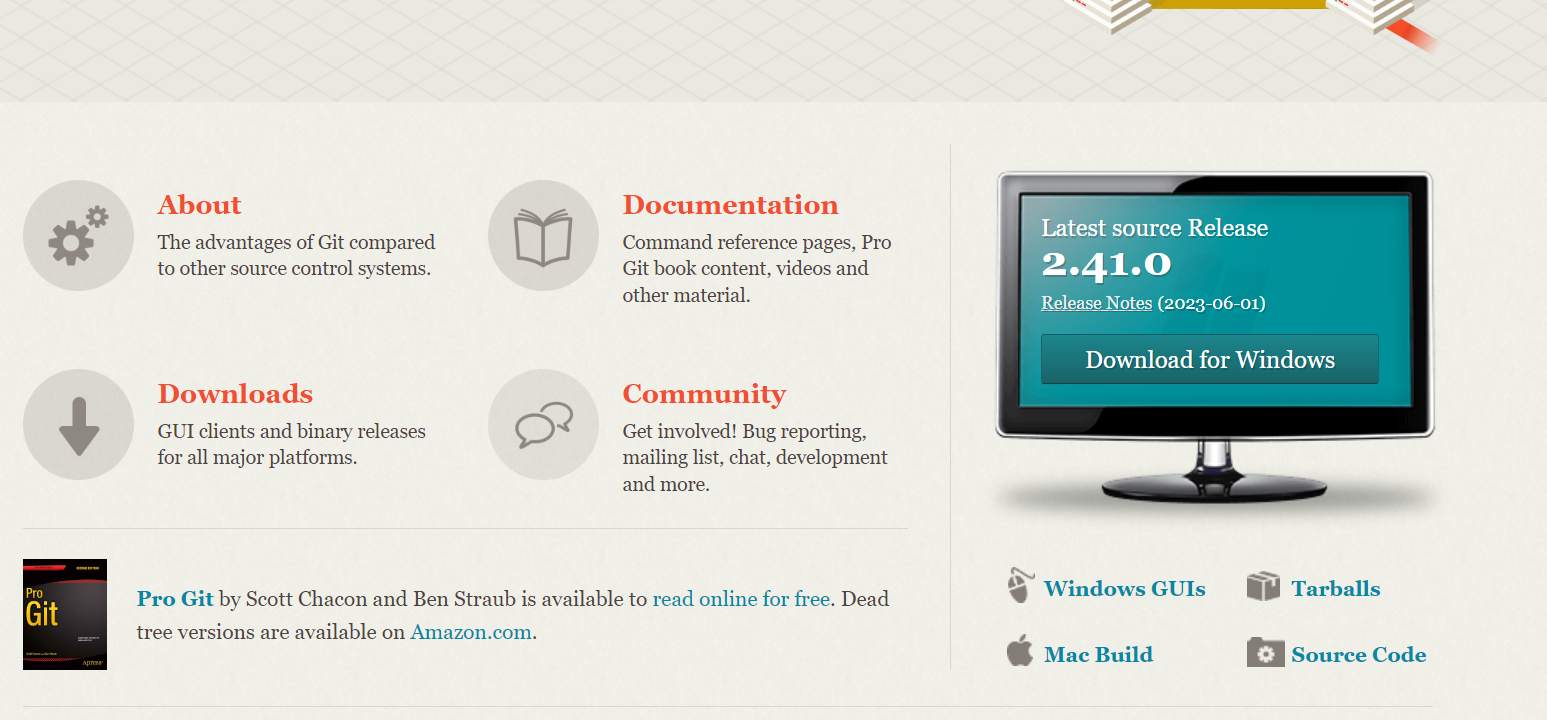
STEP 1: To get started with Git, simply go to the Git website, where you’ll find links to download the file on Windows and Mac. Simply select your operating system type and proceed with the download.
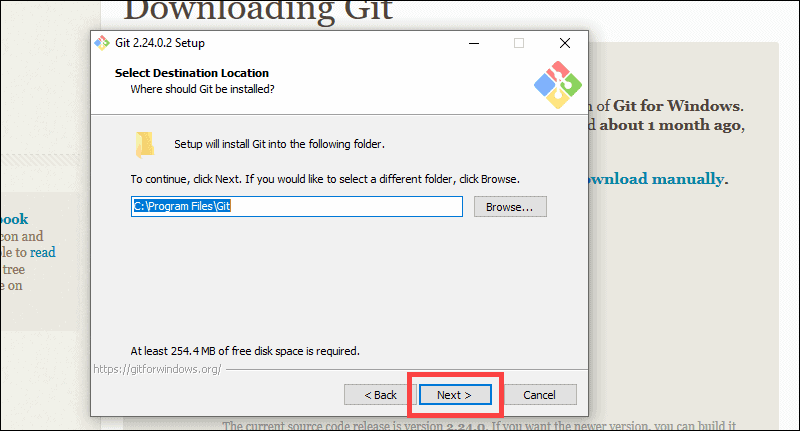
STEP 2: After downloading, continue with the installation. The steps there are straightforward as you’d just have to click on the next button, going along with the options marked by default. The only exception here would be to select the code editor you wish to install GIT with. For me, that was the Visual Studio code editor but you can go with whatever editor you use.
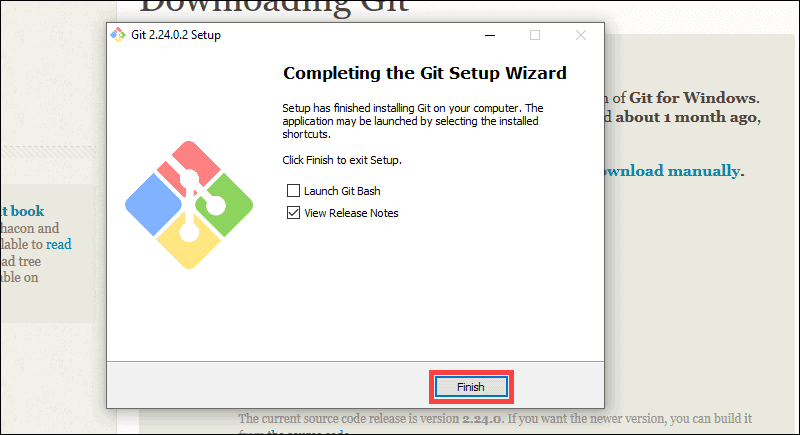
STEP 3: When you’re done installing the application, you can go ahead and launch it on your system using the Gitbash tool. It would open an interface similar to the command prompt, where you’ll be operating the Git software. You can also use the standard command prompt tool to access Git software but it's often recommended you use the Gitbash tool provided from the installation.
Basic GIT Commands
$ git init
Think of this as a way of activating git in a project you’re working on. All you have to do is create a project folder with the files you intend on working with and open it using your Gitbash terminal.
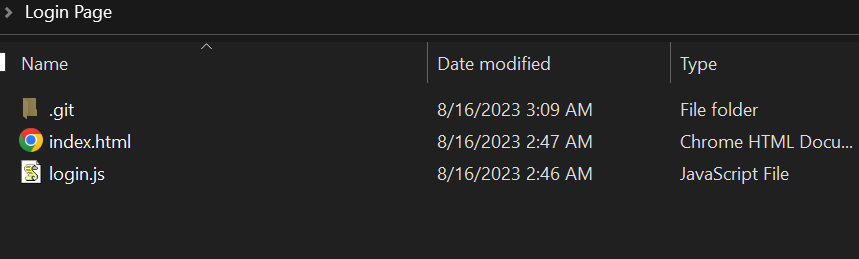
When the terminal opens, simply enter the command $ git init and it’ll create a git folder in that project.
$ git init

What just happened is that you’ve created a storage point for the codes running in that specific folder, just like how you might open a new bank account for the savings of a particular business. As you know, a bank account isn't complete without a name registered on it, which brings us to the next step here.
Configuring Your GIT
Before you start working with Git, you must log in with your name and email address in the software.
$ git config --global user.name ''
$ git config --global user.email ''

Note that these details aren’t used to authenticate your account on the remote repository, rather they’re meant to register you in the local records of the repository. This simply shows that you’re the owner of the repository and performed the work in it. Basically, it's like a trademark for your codes.
Now that you have activated a repository for your project, let's get started with the commands you’ll be using to navigate Git features.
$ git add
To get a file ready to be shipped to your local repository, you use the $ git add command to add file(s) to the staging (index) area. The staging area is like a waiting room, where your finished codes sit before they’re finally deployed to the repository.
$ git add index.html

Adding Files Of The Same Type
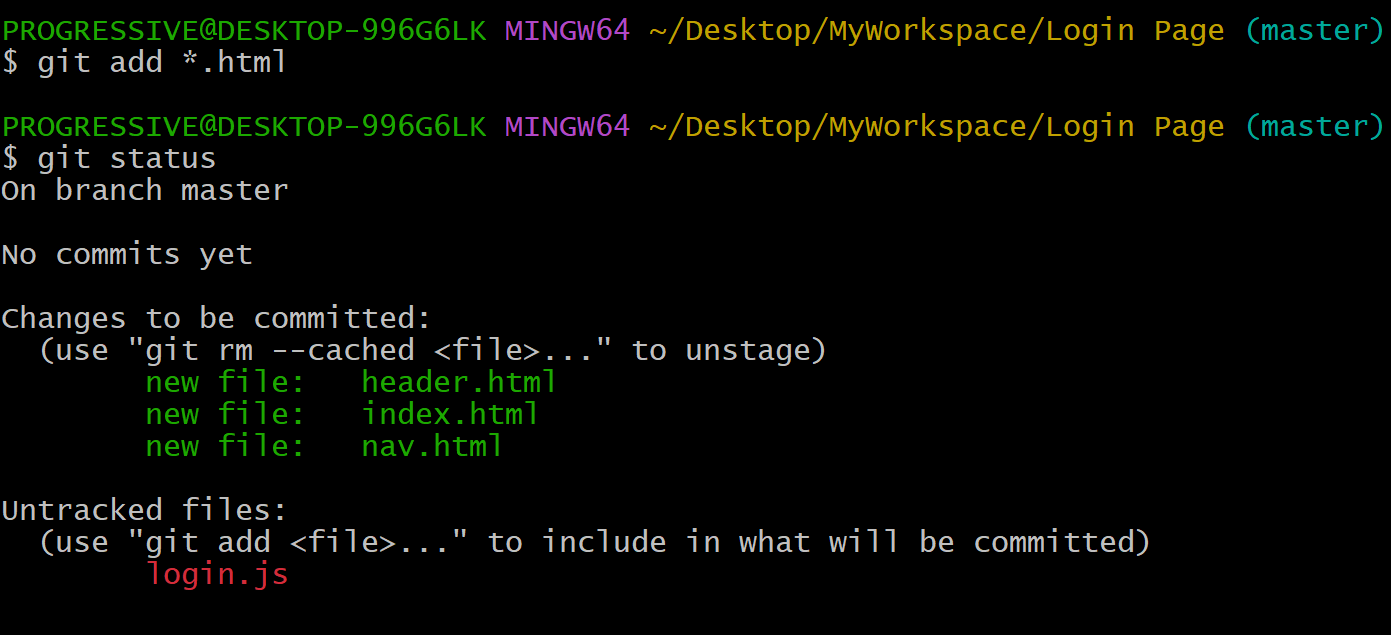
Files of the same type can be added at once using the $ git add * command, where you attach the name of the file type after the asterisk, starting with a period. For example, say we have three HTML files that we want to add to the staging area, we can avoid adding them one at a time and simplify the task by using $ git add *.html to add all of them at once.
Adding Files Of Different Types
Different file types can be added all at once using the command: $ git add .
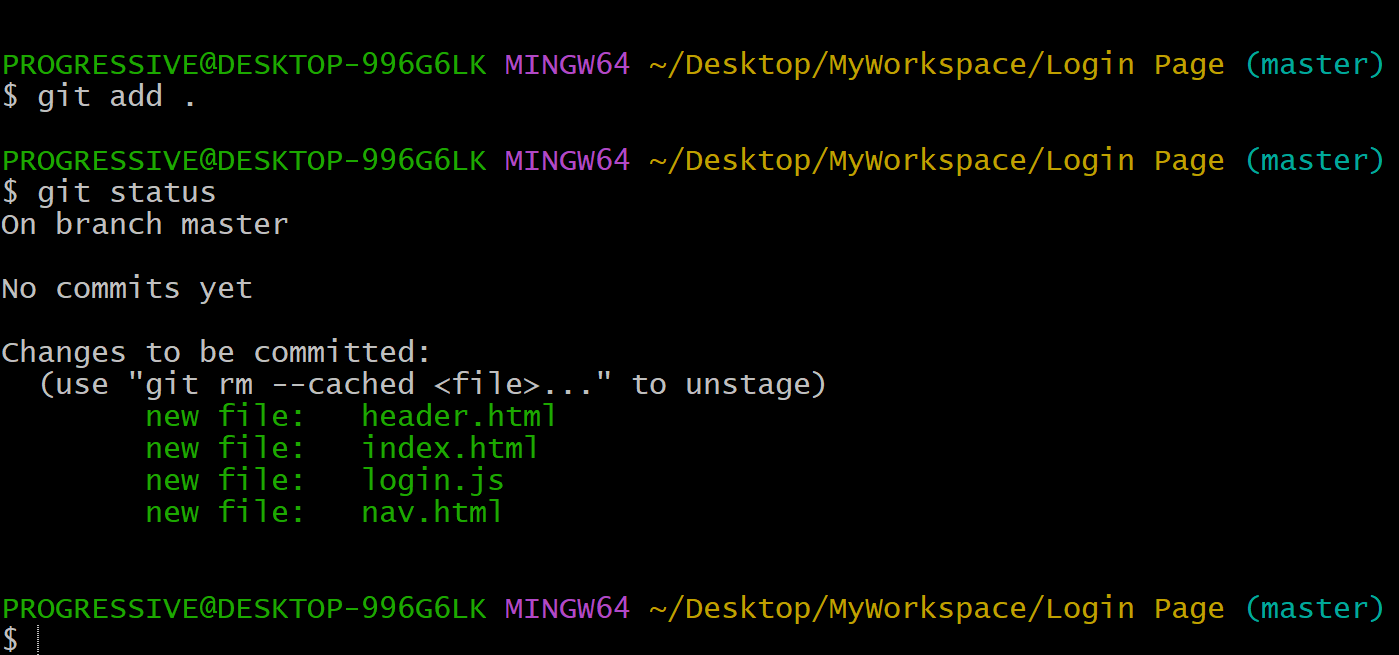
If you notice, whenever we add a file, there isn't any message verifying that the file has been added to the staging area, it's normal. That function is reserved for another command, the $ git status
$ git status
After adding your files to the staging area, you could use the $ git status to check the state of files there to confirm if they’ve been added to the staging area, modified, or committed.
$ git status
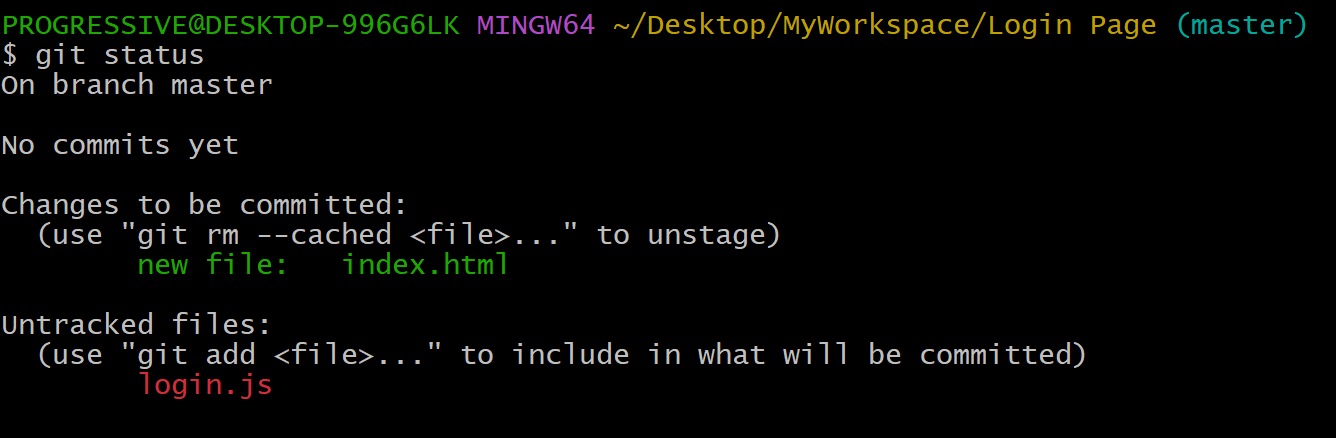
From the message, you can see that the index.html file is now in the staging area and waiting to be committed to the repository. On the other hand, the login.js file is still yet to be added to the staging, hence it is marked untracked and denoted with a red color. Adding a file to the staging area isn't a permanent action, as you can always remove the file with the command $ git rm --cached
$ git rm --cached index.html
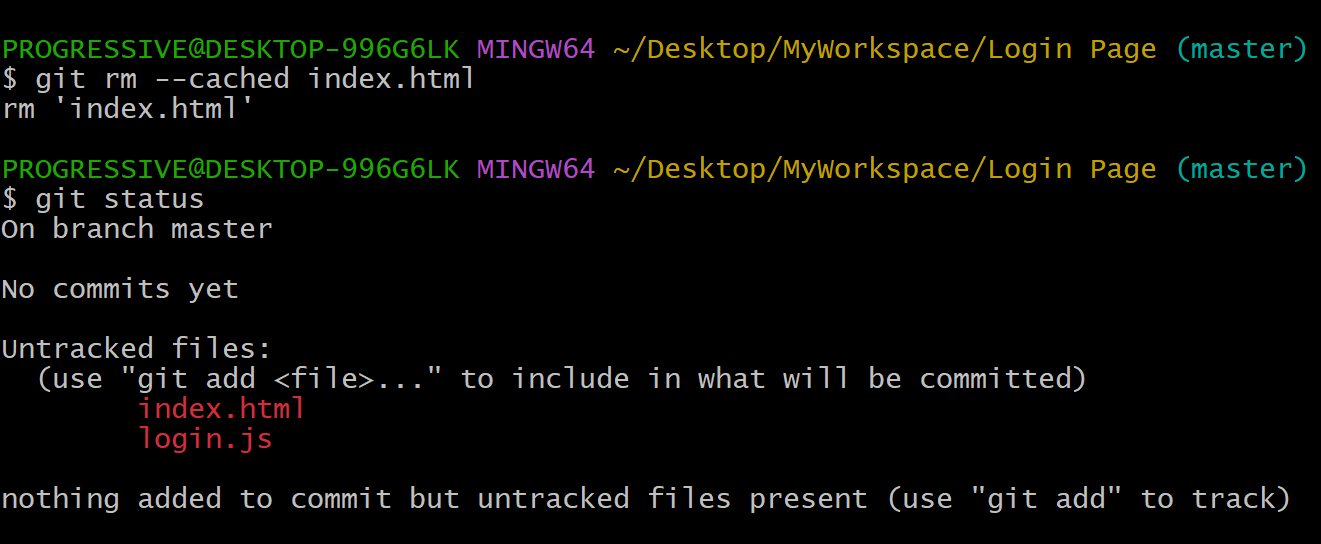
After checking the status, you can see that the index.html file has been marked untracked along with the login.js file, verifying that the index.html has been removed from the staging area.
$ git commit
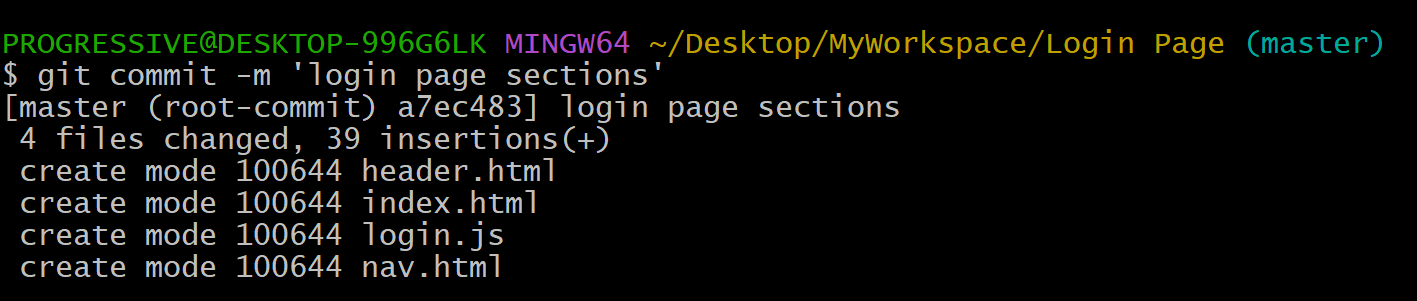
Remember how we talked about being able to take snapshots of your codes? Well, this is how you do that. After changes and confirmations have been made, you use the $ git commit to record the file for good, sending it from the staging area to the local repository. From there on, the codes now reside safely in your local archives.
To commit your files, simply enter the command: $ git commit -m ‘’ , and insert a comment within the quotes, describing briefly what the code change was about.
$ git commit -m ''
$ git branch
A branch comes in handy when you want to test new features on your codes without compromising the source code. By default, all your codes are run on a main directory, which is denoted as the master branch. With the command: $ git branch <branch name>, you can create a subdivision of the master branch, and use it to work on new codes that could be merged to the master branch if successful.

Voila! We just created a new branch called newbranch, but we can't start working on it just yet because we are still in the master branch as shown in the figure above. To access the new branch directory, we have to switch from the master branch to newbranch using the $ git checkout <branch name>
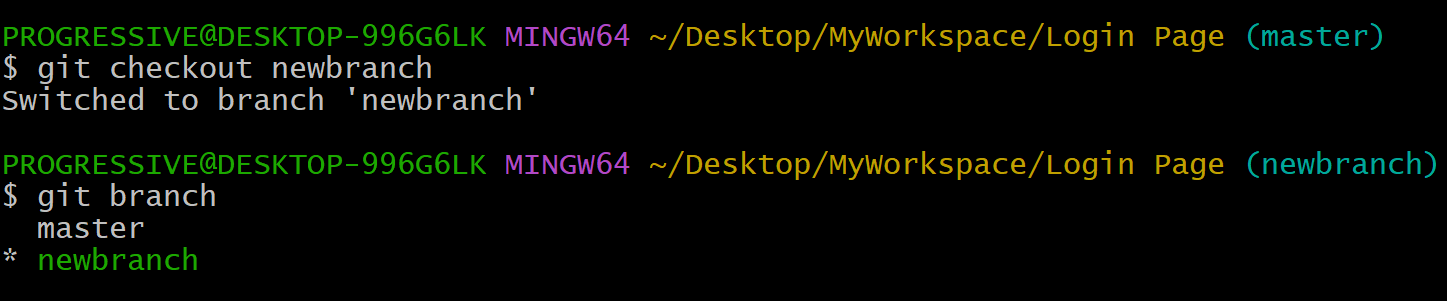
Now, you can see that we are on the new branch and can proceed to work on the directory without affecting the codes on the master branch.
$ git merge
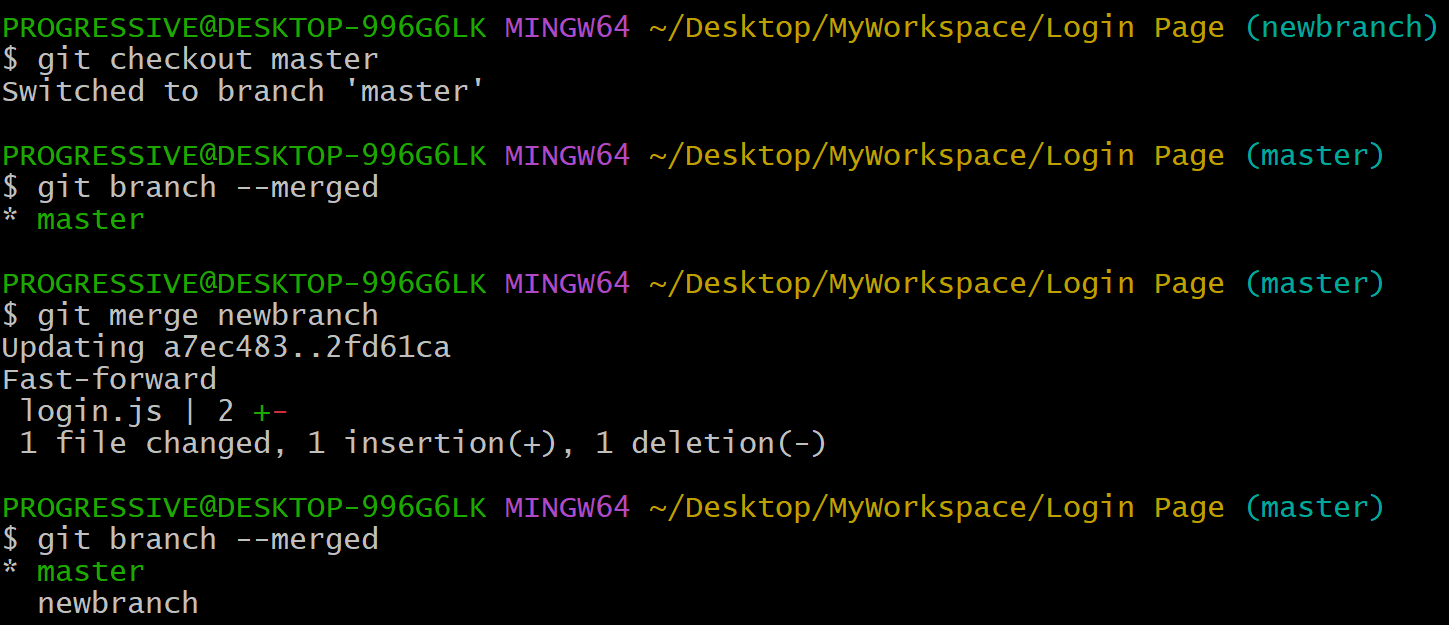
This command combines the changes from a selected branch into the master branch. When you're done testing the new updates on your code in the new branch, after committing them to the repository, you use the $ git merge <branch name> to fuse the new branch to the master branch. But before you do that, you must switch back to the master branch using the checkout command.
$ git push
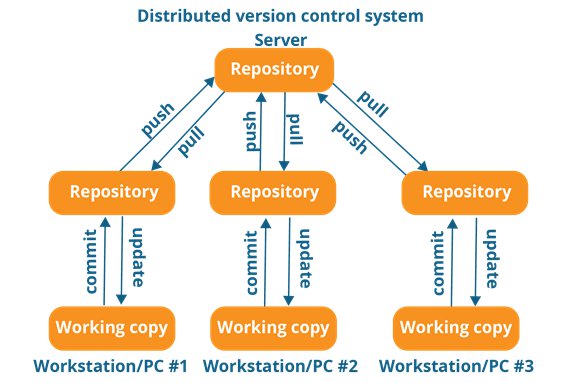
This command is simply used to push the files in your local repository to the remote repository (Github). This helps developers upload updated work done on their local system to a central repository, where changes from team members are merged, one push at a time. To use this command, you’d need to be logged in to a remote server like Github, which receives the transferred files.
$ git pull
This is the reverse of the $ git push command. The $ git pull command is used to retrieve the latest changes from the remote repository and pull it down to your local repository. For example, if someone on your team made a change to the code on the central repository, you could easily update your local repository with those changes by using the $ git pull command.
When working with a team, a rule of thumb is to pull before pushing, so you can verify that your files are up to date before uploading your codes to the main remote repository.
For more clarity, here's an illustration of the workflow of the push and pull commands:
$ git clone
While browsing through Github, if you ever see a project you’re interested in working on, you could clone the files on it by using the $git clone to download a copy of the remote repository into the local repository of your selected folder. This way, you can easily build on existing projects, and integrate your ideas into them without having to start from scratch.
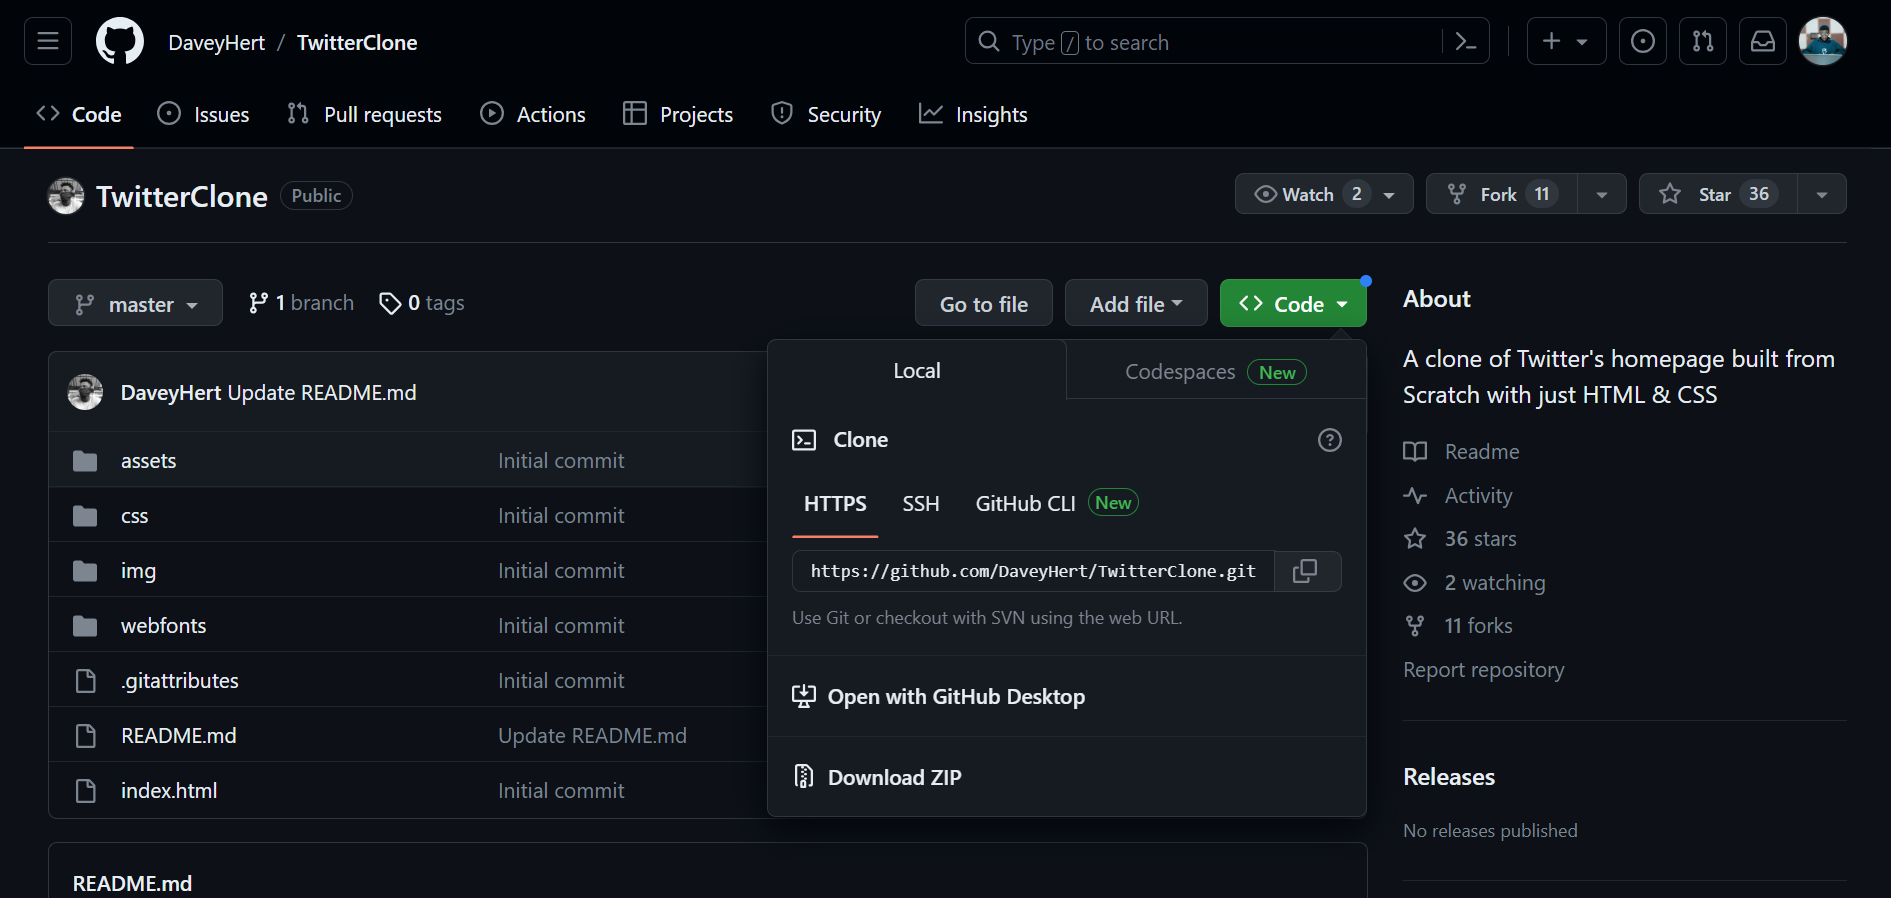
For example, if this was a project you were interested in working on, you could simply clone it by clicking on the code button, copying the URL, and pasting it into your Gitbash terminal, opening it from the folder you want to move the cloned files to. This feature enables developers to learn from others' work and contribute to open-source projects.
$ git clone (paste link)
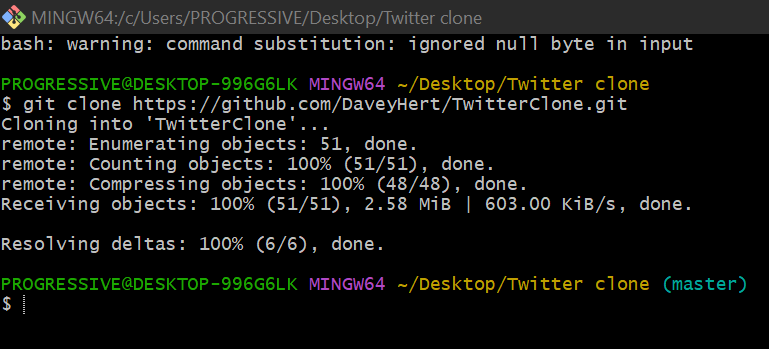
After the cloning has been processed by Git, the files will be duplicated in the folder you selected, then you can proceed to use them in your project.
To grasp the context of some of these commands, you’ll need to have a basic understanding of how GitHub works and set up an account to practice.
Getting Started With GitHub
If Git was a personal diary where you keep track of your thoughts and ideas, Github would be a public library where you can store and share your diary with others. Of course, you wouldn’t want to share your diary with others in real life, but you get the point.
GitHub is a cloud-based platform where you can publish your codes in a remote repository for others to see, and likewise get access to other developer’s repositories. GitHub serves as a central vault for codes, making it easy for developers to collaborate on a single project and coordinate each other code changes in real-time.
Collaboration is an essential part of any project. To handle tasks more efficiently, we work in teams and coordinate our services from one end to the other. The problem is, the more people working on a project, the more complex the operation becomes.
GitHub is equipped to handle that with a tracking feature that enables it to record the history of every modification that goes on with the source code in its database. The details of these records range from the name of the developer who made the changes, the files that were modified, and the time they were modified. This information helps track who made what changes and when.
How To Setup Your GitHub Account
To get started, head over to the GitHub website and create an account using your name, email, and a strong password. After you’re done setting that up, you can go ahead to create a new repository by clicking the plus icon at the far top right corner of the page.
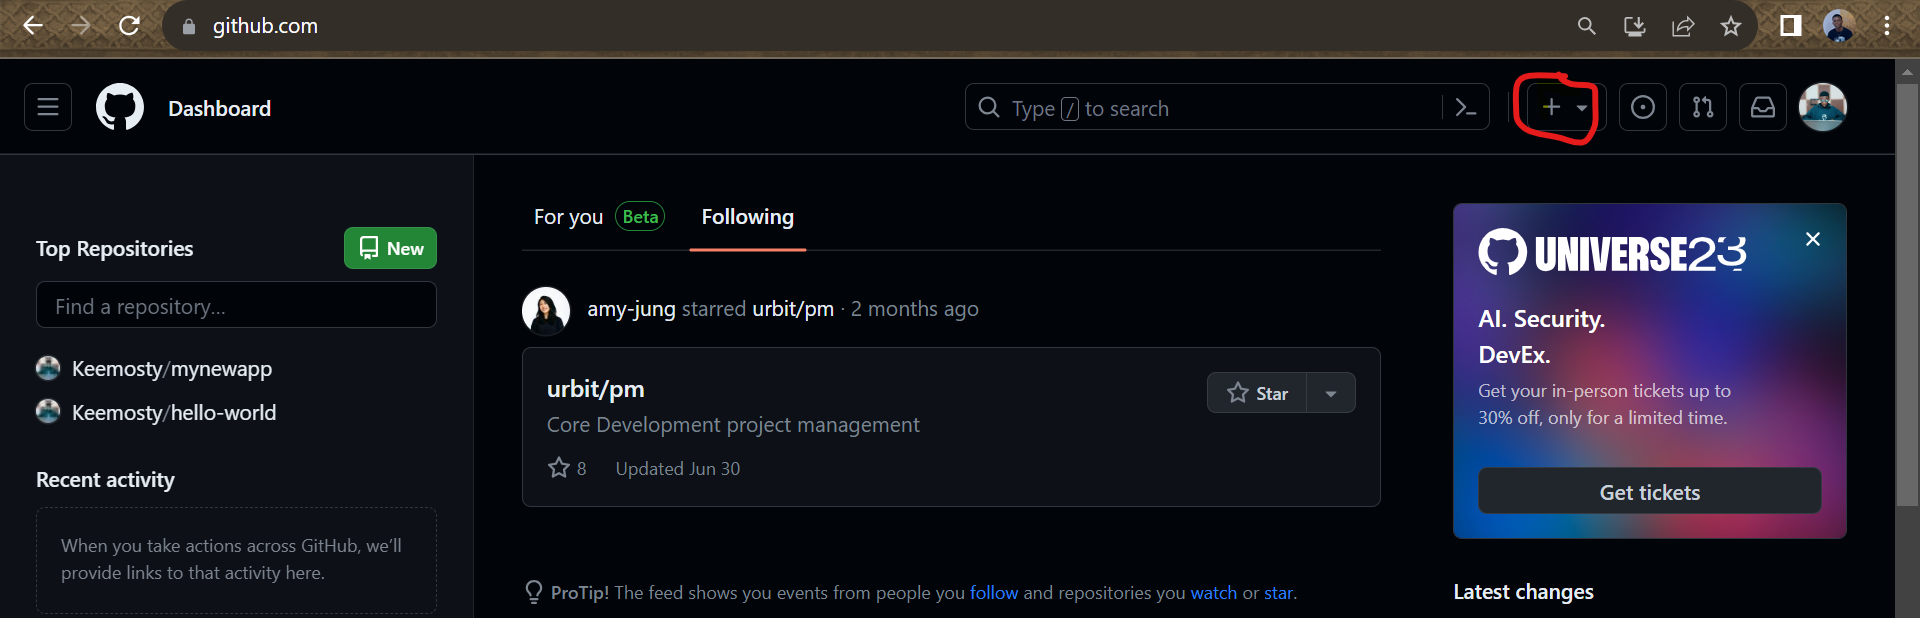
Remember, this repository is just like a storehouse for saving your project files. The difference between it and the one in your local system is that’s hosted remotely on the cloud, not installed in your local device like Git, and can be accessed by other developers (if set to public).
In the page that follows, you’ll be asked to input the name of the repository. You can name it whatever you want. Ideally, it should be the name of the project as you have it on your local repository. Next is the description where you...well describe (briefly) what your project is all about, which is optional.
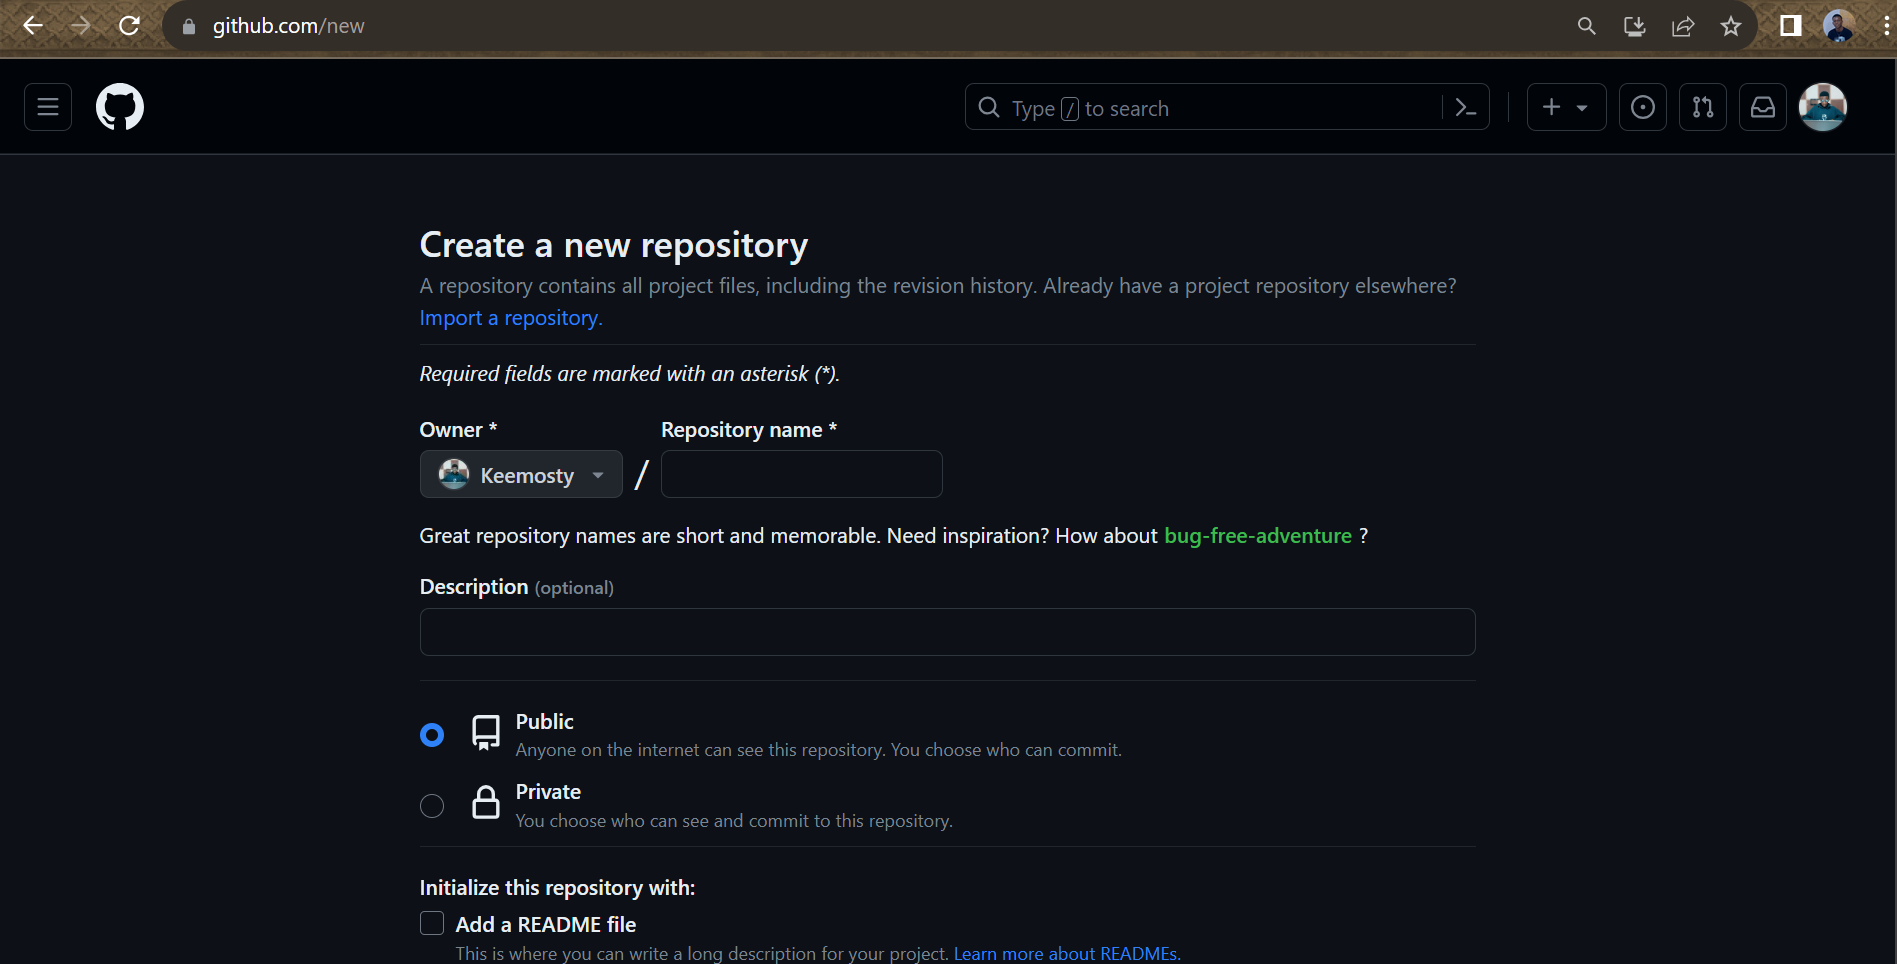
Afterward, you’re given an option of setting your repository visibility to public or private. For the public option, anyone can take a peek at what you’re working on but only you can choose who commits to it. While for private, you call all the shots, choosing who can see and commit to the repository. (This is a paid plan, by the way)
Generally, public is the way to go as it helps get more eyes on your project and fosters the spirit of collaboration, which is why Github was created in the first place. But of course, you still have the private option if you want to keep your project work behind the scenes.
Lastly, you could choose to initialize the repository with a README.md file, where you write a brief documentation explaining the concept of your project and any other relevant information you’d like to include there. This helps orient other developers interested in knowing more about your project. You don’t have to do this right away, as you can always create one after you’ve created the repository. After that, simply click on the button “create new repository” and you’re good to go.
Connecting Your Local Repository To GitHub
Now that we have created our repository, the next step here would be to link the local repository you've been working on using Git to a remote repository where you can store your files, manage them more efficiently, and share them for others to see and contribute.
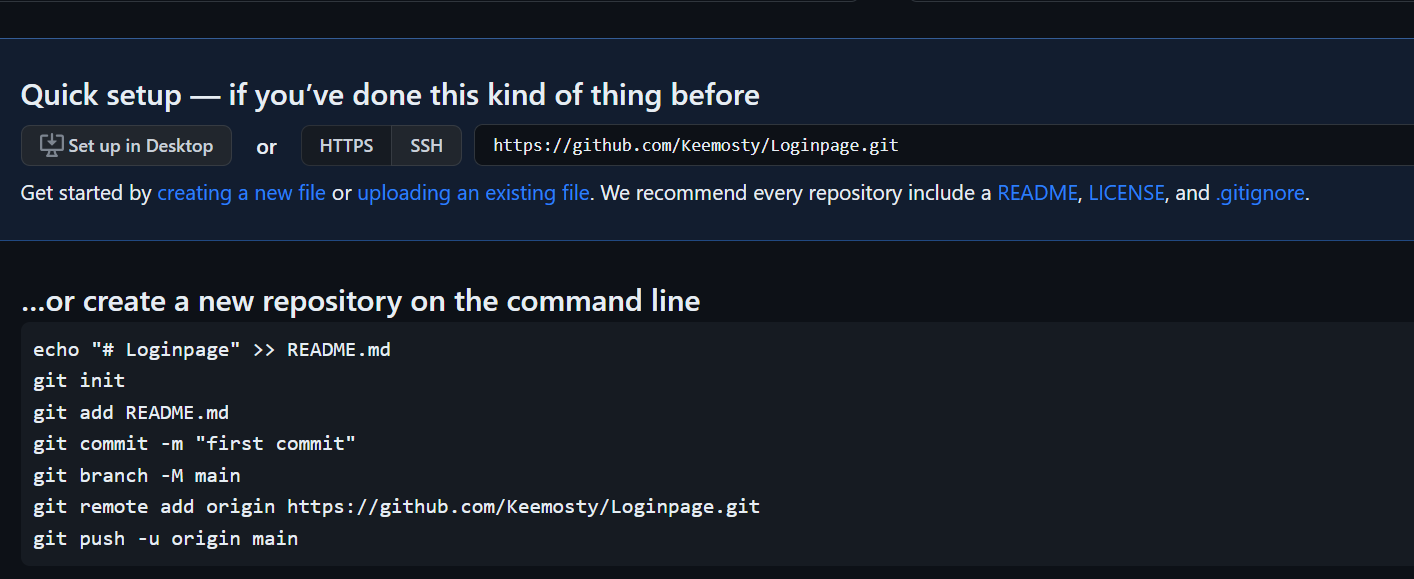
After creating a new repository, a page like the one above pops up. You can use the details on this page to connect your local repository to the one you just created here on GitHub. To do that, simply copy the text that begins with git remote*...* and paste it into your terminal.

This is then followed by a $ git remote command which you input to configure the link to the remote server. When you're done with that, the next step is to copy the text - git push -u origin main and paste it into your Gitbash terminal. In case you get an error message in your terminal, simply change the main in the text to master and try again.
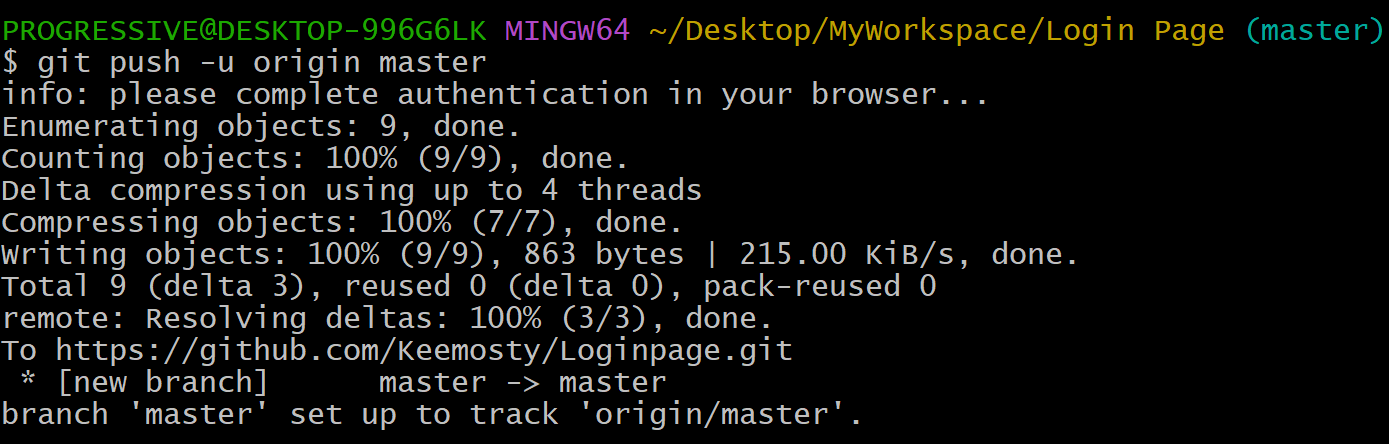
If you get this message, it means your files have been successfully transferred to the remote repository on your account.
Note that you will be asked to sign in to your GitHub account if this is the first time you're connecting your Git to the GitHub server.
CONCLUSION:
Git and GitHub are both powerful tools every developer should get accustomed to, as they are essential in building a project and managing a team efficiently. Git serves as a management tool for tracking changes made to a source code stored in a database while GitHub functions as a social networking platform for developers to host those Git repositories. Together, they help developers to manage personal projects smoothly and collaborate seamlessly with a team.
It's been a long one, and I appreciate you taking the time to read through this article. However bulky it might seem, this guide is by no means exhaustive, as there are still other important functions of Git and GitHub that weren't covered here. For further studies on Git, I recommend you check out the official Git documentation and HubSpot's guide, where you'll find videos and articles on Git functionalities. If you're looking to improve your proficiency on GitHub, I suggest you take courses on GitHub Skills.
Good luck with your projects!